Showing posts with label tips. Show all posts

Monday, August 31, 2009

Baby Toys and Diapers

A couple of my friends had or are having babies this summer, so I have been making many gifts and helping out sewing reusable diapers. For baby shower gifts I sewed these two stuffed animals I made patterns for. They were both pretty big, and I hope that the little ones will be able to play with them for a long time. One of them is a spotted doggie and the other a cute elephant with shirt and pants. I am moving towards trying to make patterns from my designs, and after I have enough done, I hope to make a whole book out of it. Kathy Mack from Pink Chalk Studio recommended a helpful book for me to read- Publish Your Own Patterns by Nancy Restuccia. I hope to get some info on how and where to publish the actual pattern since it needs to be the right size and printed hopefully on large sheets of paper. I look forwards to receiving the book in the mail! If you are interested in ordering baby gifts, please convo me through my etsy store.

One of my friends also wanted to make some reusable diapers. Having no kids or any experience babysitting, I had no idea even where to begin with sewing one. The crafty person as I am, I googled it and found a host of websites with more information I could handle. I was drawn to a few websites where the materials and types of diapers were the most clearly explained, so I could figure out what supplies to buy for a diaper making session. As it turns out, many of the the materials are hard to find in the fabric stores around town, so I ended up ordering everything online from Celtic Cloths. I have to recommend them to everyone. Jamie Karutz has put together a great resource explaining the different fabrics available, tips, patterns, and tutorials. Ordering the fabrics also ended up being a last minute thing, and Jamie responded to my emails fast and was able to get my fabric to me before I flew to Finland. I also scoured a gaggle of other websites and tried sewing three different patterns. Here are some of the resources I found most helpful:
Zany Zebra had a great list of tutorials and patterns. There was a link to a visual tutorial and they also sell materials.
Fern and Faerie was nice because it explained different kinds of reusable diapers and how to use them.
The best pattern that worked for us, to make all in one diapers was the Ottobre Design pattern. It was the best size and fit the best around the legs of the baby. It was also closest to the diapers that my friend already had store bought. Ottobre Design is a luscious Finnish sewing and craft magazine with patterns for children and teens. I have flipped through it several times at the store and oo-ed over the beautiful layout and designs in the magazine.
If you are unsure, of how to sew one, I would suggest to sew one out of some scrap fabrics before cutting into the more expensive materials. This is how our first diaper out of the "real" material turned out. I got the foldable elastic from Celtic Cloths that could be sewn on the top of the seam on the outside of the diaper edge. My friend ended up deciding she wanted to have a soaker pad that was just velcroed on top of the diaper instead of putting one inside the diaper.


Here are some other baby inspired gifts and ideas from Etsy:
On the top is a hand screenprinted piece by Strawberry Luna. You can buy a whole set of alphabet prints from her store. The adorable green shoes are from Heather's Hobbies.
In the middle row is a cute baby Mai Tai from My Blessed Baby and a pattern for a cute baby hat from McHat. If you are unsure of your sewing skills, you can convo them through Etsy and have one made for you. I thought the Ouch Pouch from Pillow Sew Cute was an ingenious idea and would make a great baby shower gift. Pair it with a cute sensory toy owl from Cafe Crinkle.
For the green conscious baby, the reusbale Wrap-n-mats now have snack pouches as well. I use one for my lunch sandwiches and am totally in love with it. Etsy also has many stores that sell reusable snack pouches etc.

If you are not familiar with Instructables.com, definitely go check it out. They have great tutorials for just about anything you could ever imagine. Here are just a few picks for our baby themed post: Baby sling by Momma+boys, and a blanket and donkey baby gift set. I posted this one a long time ago for an etsy competition... Hope you enjoyed the article If you are into Jane Austen, I have a super post for you coming up!


Wednesday, April 8, 2009

Shrinky Dink Mania

We are planning a shrinky/dink-craft-get-together with the girls, so I wanted to find some inspiration before the pen hits the plastic. Above are keychains by Evie for mothersday; thats just around the corner... Here are some awesome little shrinky dink ideas:

I got this picture from Etsy a long time ago, but I dont remember the shop name. I'll do some research and try to post it later.

Cute little robots from the Little Lost Robot blog.

Jessica at How About Orange printed on her sheets from a printer to make these adorable tags.


I love Wee Wonderfuls from way back, and found that she also has a shrinky dink tutorial for some cute pins. I had to put two pictures...


Cute little dogtag idea from Making it Lovely. She also had a nice pink keychain.

The most awesome jewelry by Irina. I have to make something like this for myself.
Another place to get awesome shrinky dink jewelry is Fuzzy Bunny Shop on Etsy.
Before I make this post too long, I made a collage of some more pieces. There are so many people doing imaginative things with shrinky dinks its amazing and hard to choose! Going from top left corner clockwise:
Robot necklace from Luna 1375
DillonDesigns rings- I never even thought of that!
KaylaJane has really pretty charms and pendanst in her etsy store.
Passion Flower has cool cutouts.
DIY ice cream necklace with glitter and rhinestone for the younger kids out there.
Shrinky Dink Test Lab has a ton of great info on the product. Here are some wine glass markers.
I love everything that She Felt Pink has in her store. a lot of old tattoo design type of items.


I hope this post has a little bit of inspiration for everyone. I can't wait to get my hands on some plastic! I'll post some pictures of our creations next week. I know it is a new month, and I really need to do my give away, but its been crazy busy. I need to do that asap...

Wednesday, March 4, 2009

Shrinky Dinks and Drawing Easel Idea

I hope you are doing great today. I wanted to share a craft with you that I had almost forgotten: shrinky dinks. I remember making these with my mother when I was a little girl. Oh, the thrill of watching your drawing shrivel up right before your eyes! Last year I had seen it somewhere and brought it up with my husband, who to my suprise had never even heard of shrinking plastic. So I headed out to the nearest craft supply store (A.C. Moore) and found a great deal on some shrinky dink plastic to educate my husband on craft making. It came in a nice pack of 8 sheets, so no worries if you mess the first one up. There are directions if you have never made any. Its super simple, basically just draw your design, cut it out with a pair of scissors, and then bake at 325 for a couple of minutes. Done!

I used regular colored pencils to draw, but it was a little dusty after baking, so I had to fix it with some polyurethane spray. You could use markers as well. The nice thing about the sheets in this set was that it was see-through, so I printed out some photos (left) from my desktop and used them as a guide to make fun gifts to my family and friends.
I made a whole bunch of keychains/zipperpulls, earrings, and a pin. To the left you can see a pair of the earrings.

To get an idea of how large to make your drawings, I have the below guide of before and after baking size.
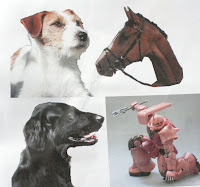
Below is a flathaired retriever pin for my friend who has two, and zipperpulls/ charms for my mom and sister of our dog and horse back home. (I hope they dont read this before I give these to them)

Here's a collection of other charms.
My husband is into these plastic Gundam model kits, so I drew him some of his favorite characters.
I started an 8 week botanical illustration class this week as well. It is taught by the very talented Louise Smith, who has a beautiful website http://www.greenstems.com/. One of the ladies in the class had made her own little travel easel from a camera tripod. I thought I'd share the simple design, in case anyone else needs to make one. Basically, she screwed a piece of wood to the piece that comes off on the top of the tripod, and added velcro on it. The other half was a piece of corrugated plastic board with velcro on the bottom of it. Voila! Stuck together makes a great mini easel that travels well, if you like to paint or draw outdoors.

Saturday, January 10, 2009

Awesome links!

Oh, I can't describe how excited I am. I have been thinking about making little soft houses for my stuffed animals, and happened upon this blog with a tutorial for one. I have to share it here with you. You can use buttons, velcro or ribbon to close it up! I can not wait to make one! I had thought about just making a soft one with batting for walls, but Dawn had the great idea of using some of the plastic canvas used for cross stitching for support.
She also has a great blog and some other tutorials.

For all you looking fo rnew project/gift/craft ideas for 2009. Visit TheLongThread's blog. They have a list of "Top 100 Tutorials of 2008" . The list is even conveniently sectioned to baby, kids, home, clothing, etc. Too many cool things to do, so little time!

I also need to mention my Christmas present. I got a book titled Two-at-a-time Socks. I already completed my first pair! Now let me tell you why I like this new way of sewing: First, I normally dont use a pattern and just knit trying to socks on for size every once in a while. That normally backfires by the time I get to the second sock, since I am constantly going to the first one and counting rows and stitches. They always end up being slightly different sizes.

Second, before, after I had finished the first sock, I had no inspiration left to make the second one. Third, this book has very clearly written directions, so everything was easy to follow.

To start my socks, I first knit them regularly on 4 straight needles, about 3 times around, before transferring them onto a single long needle. After I got the hang of it, knitting this new way a as easy as a snap of a fingers.

Monday, November 24, 2008

Thanksgiving sale and mittens

Oh, I have to share these mittens that I just found a pattern for! But first, let me mention that I will be having a thanksgiving sale at my etsy store from Friday 28th to Monday 1st. All items 20% off before shipping. In payments section select payment method Other, and in message to seller add coupon code "Barefoot". For other Black Friday sales on etsy, visit: http://www.blackfridayonetsy.webs.com/

(above- the mouse print I mentioned in my last entry)

I have been busy in the craft room lately too. I've made some new stuffed animals, now being posted in my shop. A friend came over last Sunday to make an apron (we had a craftdate), so I decided to make one for me too. I came up with a cute little design that ended up working out pretty well. It reminds me of play dresses for little girls, so when I wear it, I feel like giggling a lot. ;) Maybe I'll might make a couple of these for sale in the etsy store as well after new years. I also was inspired and started working on that Simplicity tunic, that I cut the pattern out for several weeks ago. I am always confused with the sizing info, but I made a size 12. The bust and waist fits ok, but it's too tight around the butt, so I have to go, and loosen it in the seams. I'm about half way done, the arms, neckline, heming and zipper still need to be sewed. I am leaving the key-hole out from the front.


Ok, so now to the mittens. After the last craft fair, I have been knitting a lot, hats and scarves mostly. I have a couple of designs I wanted to do. One for my mother in law (if I ever finish it- well, I guess I should start first...) and a pair of mittens for me. The blue ones on the left are a cowl and hat pair I made, they are such a luscious soft blue yarn! So cute, makes it look like there are little ears. (chuckle)

The yarns in the picture below are some that I got from Michael's last week. The brownish gray is for the shawl, and the colorful ones I was going to use for little projects- now for the mittens. I'm thinking the orange and green for them? The pattern is from Hello Yarn Handspun Yarns. She has so many cute patterns for mittens, hats, bags etc. I have to make the bug ones for my husband at some point. Oh, if there was only enough time...


The shawl pattern that I was going to make for the MIL, is from Knitty. It is so versatile! I can't wait to start on it, but since it is a longer project, I think I'll make the mittens first. If it's super sute, I might have to make one for myself as well...


Friday, November 14, 2008

Favorite fabrics, new idea for Butler bag

Ooh my goodness, it has been so busy after the bazaar. I got several comissions for things, mostly knit items, that took me a week to do. I made some really cute winter messenger hats and a scarf, and made another Amy Butler bag. I came up with a new way to sew the zipper on it, so I thought I would share to all those who are working on one.

After cutting everything out, adhering interfacing and ironing, the zipper is one of the first things I sew. With this technique the bag ended up being a little skinnier than the previos ones, so if you want it to be wider, make the top part of the outer fabric wider.

- sew the outer fabric down the middle like you are supposed to according to the pattern, I sewed a larger seam than the pattern asks for. (see picture, on left)

-sew the lining to the underside flaps of the outer fabric. Press the seams flat. You can see on the right side that the lining ends up being really wide this way, I just cut it so both layers are same width.

-next place zipper on the back side of the flap facing down, pin in place and sew all the way around. Voila!

-now to attach the two short pieces at either end, I made kind of an X-seam, so that both the front and lining fabrics can be attached. Sew all the 4 edges separately, and then the small distance in the middle, I sew that flat through all the layers. (See pictures, the middle has not been sewed yet, there is still a hole)

-after this, I attach the handles and pockets to the side panels.

-I sew the side panels on first and then get to the outside side panels. Now this might be obvious, but when you sew the panels together, I find it easier to sew it with the panel side up, rather than sewing on the zipper flap side. (see picture, on the side that is pinned)
-also something else that worked out, was attaching the lining and outer layer together before I turned it inside out. I just sewed the two layers together at the top. (see picture)


There are also two portfolios that I will be in so I finished two prints for those. One of them was a little ant print, that I got the inspiration for from Proverbs 6:6

Go to the ant you sluggard,
consider it's ways and be wise.
It has no commander, no overseer or ruler,
yet it stores its provisions at summer
and gathers its food at harvest.
I had a good time carving, since I have not made a linocut in a while. The other linocut I made for the other portfolio was a little mousy. I should get a photo of that as well...

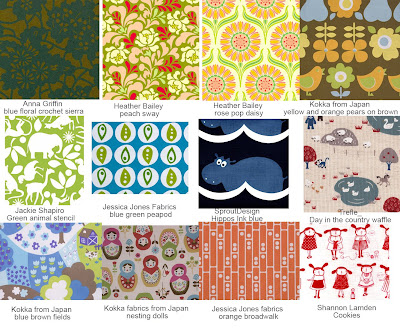
I've been browsign fabrics as well and wanted to post some of my favorite picks. They are from various sites, but I put the names down so you can look them up if you want.

Finnfactor Design

Finnfactor Design